Double Giant Bomb Guide
Re-published:
Original Guide made March 03/2015: http://forum.supercell.net/showthread.php/577223-Base-Break-Down-Guide-to-the-3-Star-Meta-TH9-War-Bases-Creation-and-Dissection
Original Guide made March 03/2015: http://forum.supercell.net/showthread.php/577223-Base-Break-Down-Guide-to-the-3-Star-Meta-TH9-War-Bases-Creation-and-Dissection
Note: This guide is outdated, but still is informative for beginners and intermediate base builders. Some information publish here, might not be applicable for current and up to date standards as the circular shape isn't as common in today's standard anti-3 star base, BUT the Hourglass Shape still is effective, along with the fact that territories usages is important. Also please read my [Groups, Sections, and Territories] Guide to understand this guide even more better.
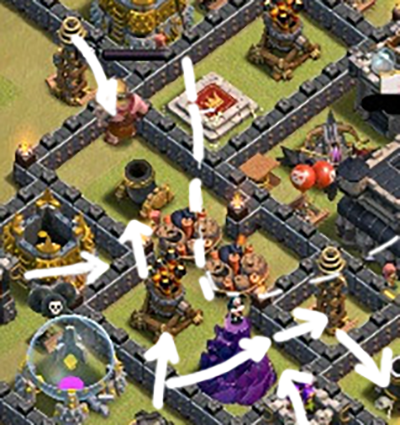
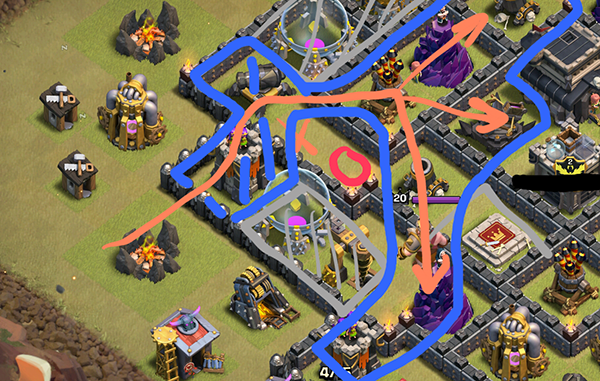
When it comes to double giant bombs, their main point is to set a trap for the hogs to flow and path into and ultimately all be killed. Double GIant Bomb's true purpose (to me at least) is to divide the sections between which Hogs can take and hogs cannot take. The sections that the Hogs can take though will need minimum 10 Hogs, but since the Double Giant Bomb thread (even if it's a feint) is there, Hogs users have to think more than twice due to the fact that the path of the hogs is threatened by the double giant bombs. There are good examples, and there are poor examples.
Guide to Setting Up DGB
|
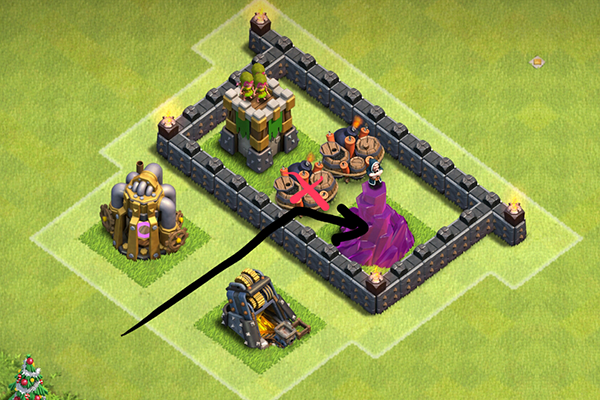
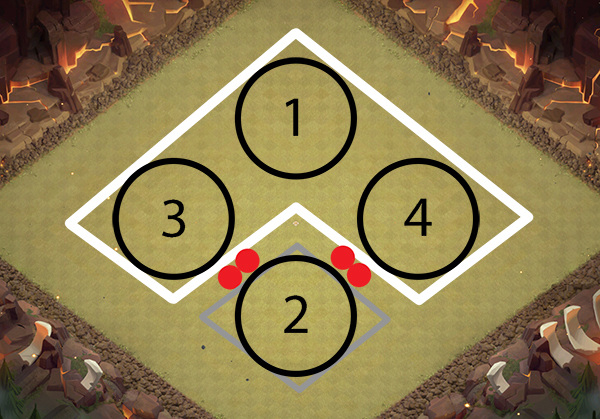
Positioning double giant bombs is important to the base. For a base, there are 'section' which are divided based on the 'weight' of how many defenses are located within this section. The most part a section would contain an AD, a wizard tower, a mortar, 1 archer Tower and 1 cannon. Sound familar? This is because the typical base spreads out the defenses evenly to cover the North/East/South/West locations of the base.
Let's use this simple image as an example. This is a common base planning, separating the four areas in a base.

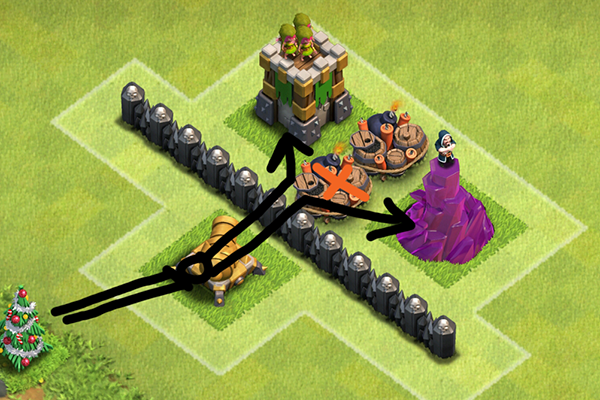
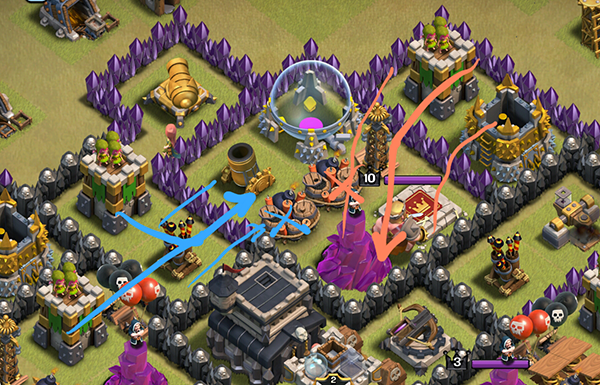
Double giant bombs are used to separate these into it's specifc areas. Here is an example which I see alot, of why double giant bombs are bad.
|

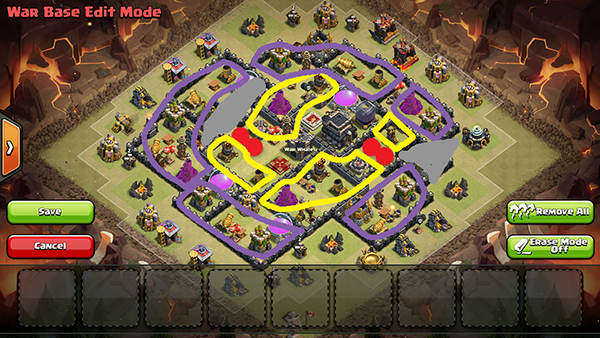
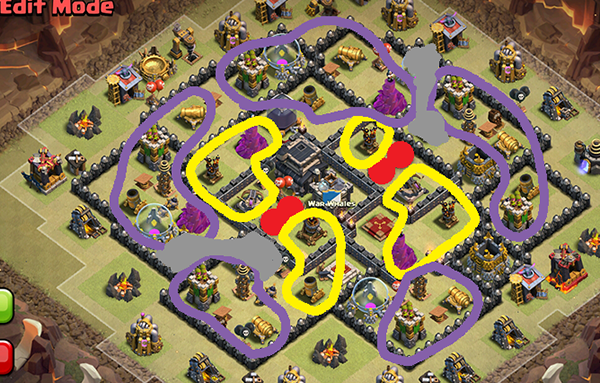
Dividing it More Deeper Territories
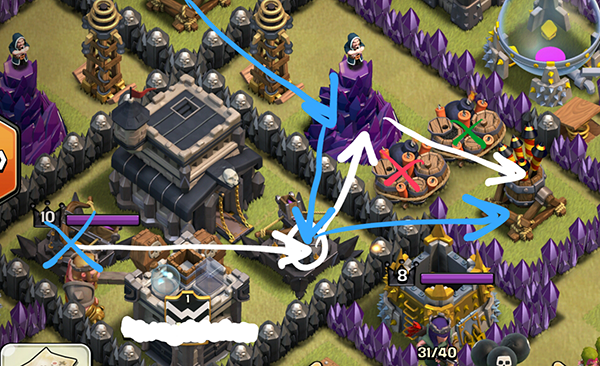
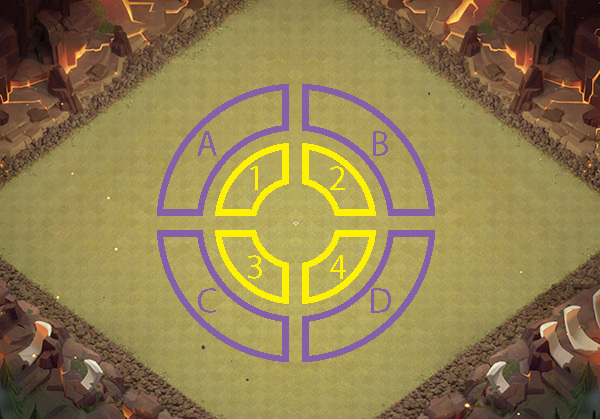
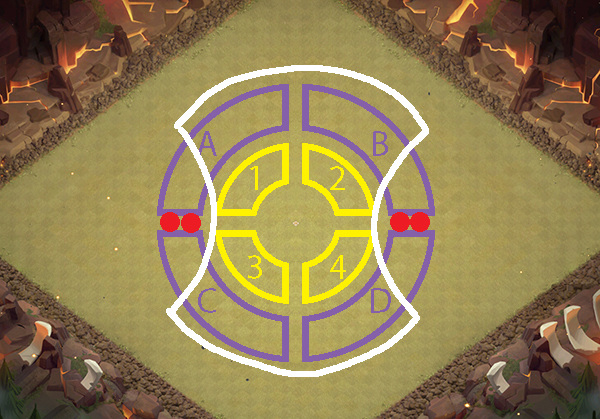
Most bases will look something like this, having 4 sections, the outer sections (purple), and 4 inner section (yellow). The weight is distributed as such.
|
Example Using my Metaki Series
|
Bad Example and Bad Base Design Sections
The General's Flaw
Watch out for Dismantlement
Example Base #1: The Side Step
Example Base #2: Bad Pathing
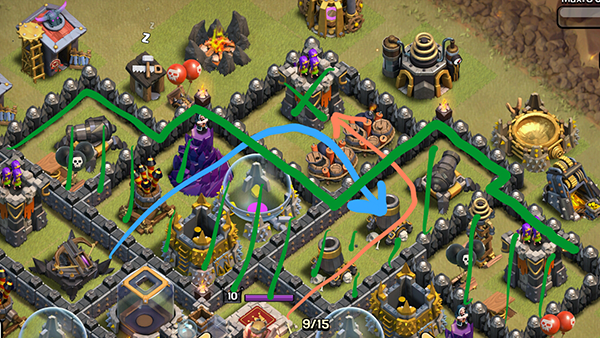
Example Base #3: The Disconnect
Example Base #4: The Straightforward/Side Sweep
|