
Groups, Sections, and Territories
Published October 29,2015.
Welcome to the guide where I explain how to view a base, not just as a whole, but by Groups, Sections, and Territories. It allows flexible view of the base, and break down of areas where it needs to focus on coverage, trap placement and most importantly, concepts within the G.S.T. When it comes to a good base, even without walls, and sections, the interaction and coverage of the defenses, buildings, and traps should already be able to protect itself. When I see people making bases, they just look at the whole thing and then determine if it's good or not. But the thing with base designing is the fact that a base is created with multiple sections, although let's say 3/4 sections might not work, that 1/4th section might be the best coverage, and wall usage that can easily brought to the next new base. With this guide, it basically focuses on breaking down a base, and looking at it by chunks.
This guide may seem like "WOW, it'll take probably 30 minutes to see even a single base!", well not really, I'm just explaining this groupings into more text/images, but once you know what to look for, it'll just take you about 5 seconds to group, section all defenses within the base. Afterwards you can easily zoom in and see where area needs more work. Although this guide uses a TH8 for examples, it still applies for TH9 bases, but just an extra step where there are more to the base, and has Queen Territories.
This guide may seem like "WOW, it'll take probably 30 minutes to see even a single base!", well not really, I'm just explaining this groupings into more text/images, but once you know what to look for, it'll just take you about 5 seconds to group, section all defenses within the base. Afterwards you can easily zoom in and see where area needs more work. Although this guide uses a TH8 for examples, it still applies for TH9 bases, but just an extra step where there are more to the base, and has Queen Territories.
|
When it comes to base design, it's the interaction between defenses, coverage, and traps which makes it work properly, and due to majority of attacks being wall skipping troops they do play a factor but after the minimum requirement of wall section have been completely, it's mostly dependent on the defense.
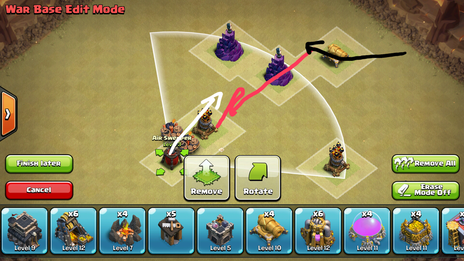
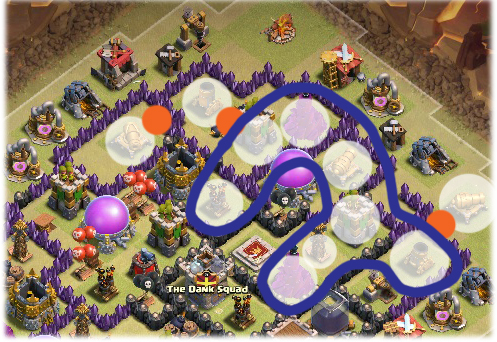
For example if you look at this image, without even seeing the walls, junk buildings, or defenses, you can easily determine that a frontward attack from the cannon with loons will not have good result due to the fact that the wizard towers are away from the air defense and are double stacked. It's the placement of the defense which matter.
|
Defining Groups, Sections, and Territories
Back to the guide, Groups, Sections, and Territories, although these terms are similar this is very different when it comes to defenses. Think of it as this (gang terms), groups are the three or four buddies that hang out and protect each other, sections are the streets of which they are in charge of, while territories are they are the gang that controls the East side of the city. This plays a role when it comes to building a base.
Some key points I'll explain later on:
In Groups, it's the relation between 2-5 defenses, so spring traps are important.
In Sections, it's the relation between 2+ groups, so double giant bomb between is important.
In Territories, it's the relation between sections in the whole map, so determining the ratio/how big the sections can be is important.
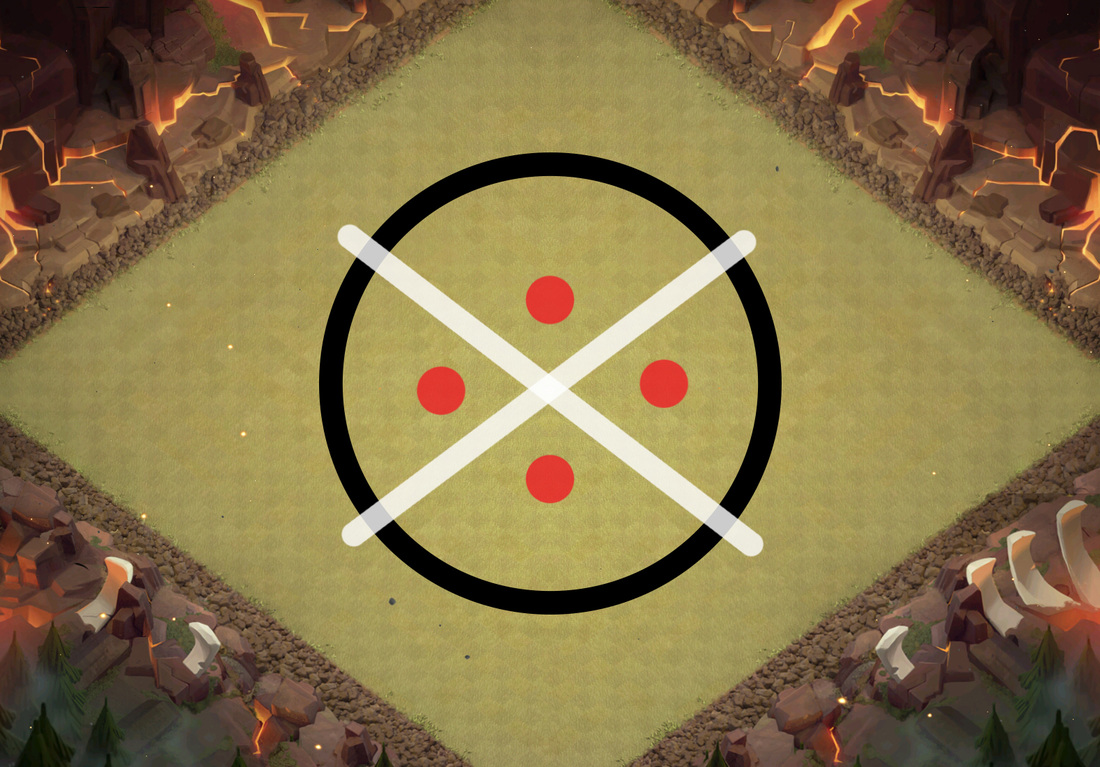
Groups
Sections
Territories
|

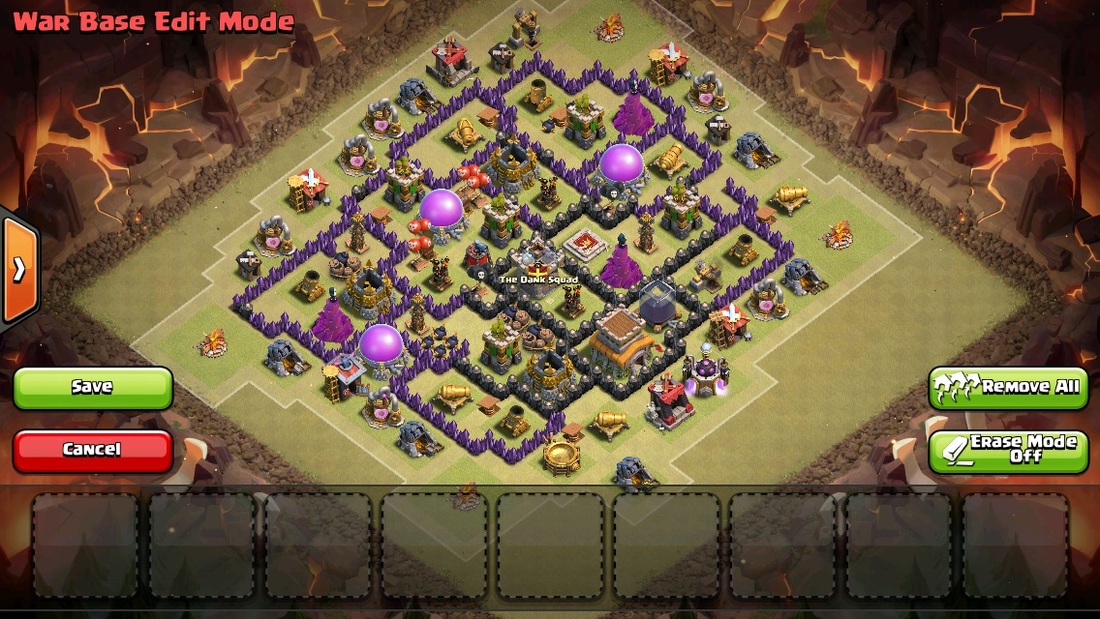
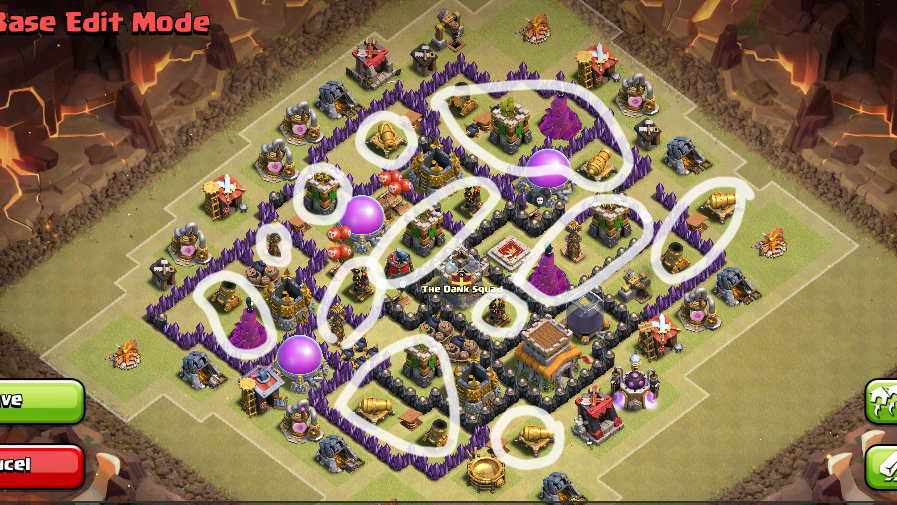
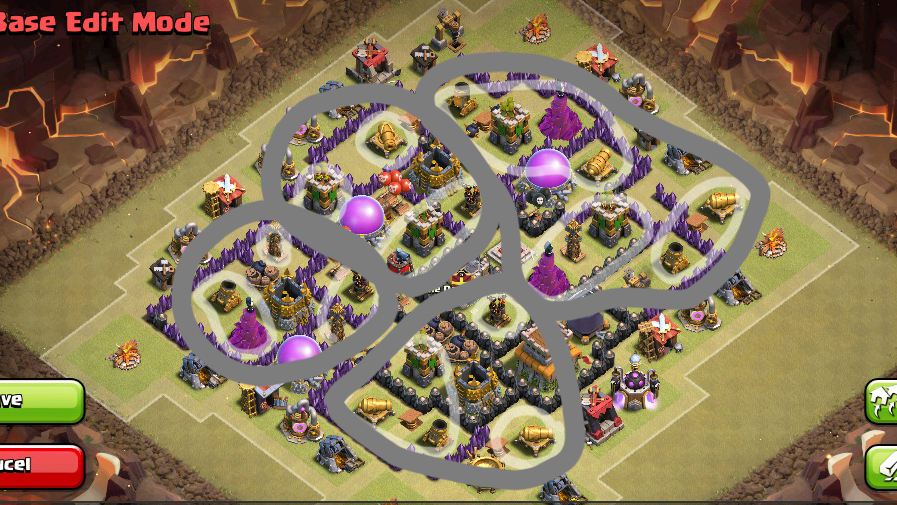
Throne of God: Example For Groups, Sections, and Territories
Here is an example using GarlicAK's Throne of God: An Anti-3 Star TH8 War Base. Note, this was the first version of which he released, so it might differ from what he currently has. I have done some explaining of the 3 G.S.T. to his base when it was published, it's different compared to what is below but it explains almost the same thing, so you can check it out within his thread.
Link:http://forum.supercell.net/showthread.php/655455-Throne-of-God-An-Anti-3-Star-War-Base
Link:http://forum.supercell.net/showthread.php/655455-Throne-of-God-An-Anti-3-Star-War-Base
Groups
Sections
Territories
So why is it important?It's important because you need to understand there is a balance for every base, all shapes and sizes. If you are going to make a 'circular' base for example, you aren't going to have a section with majority of the Air Defense concentrated on one side. Like I've said in the beginning, a good covered defense should already be able to cover itself within a given area, and have a balance with other areas.
|
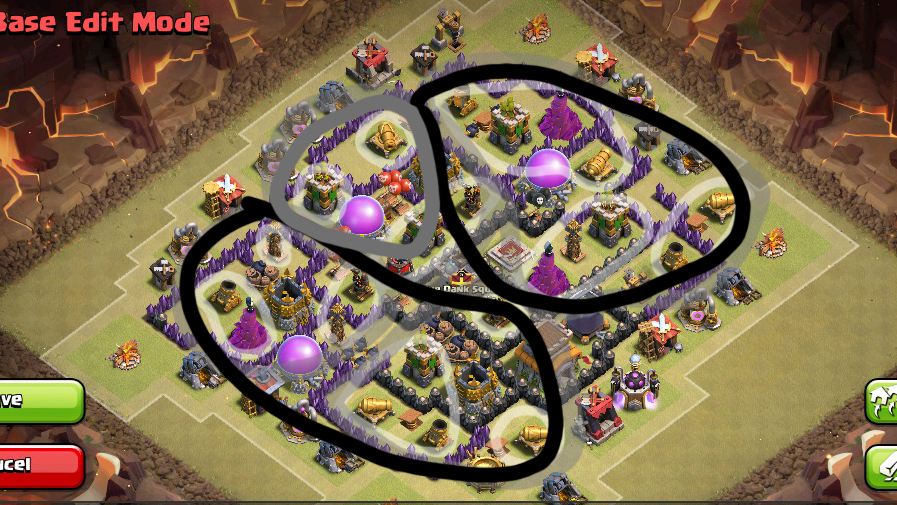
Breaking Down the Base with G.S.T.
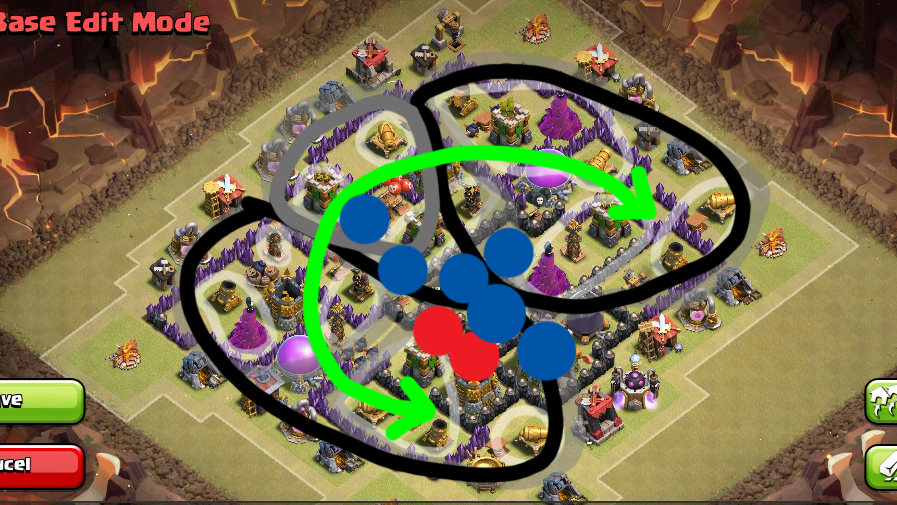
After I've shown the G.S.T. to Garlic, the creator of Throne of God, he improved his base really well afterwards, and changed up his base. I'll show below the bad example (before) and the changes which are better (after).
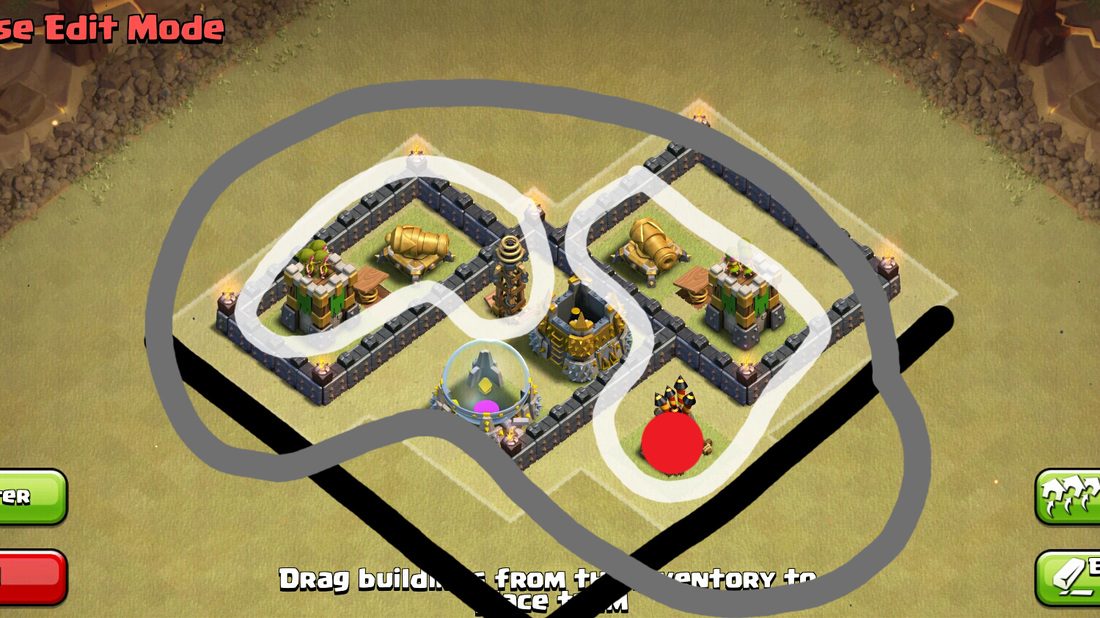
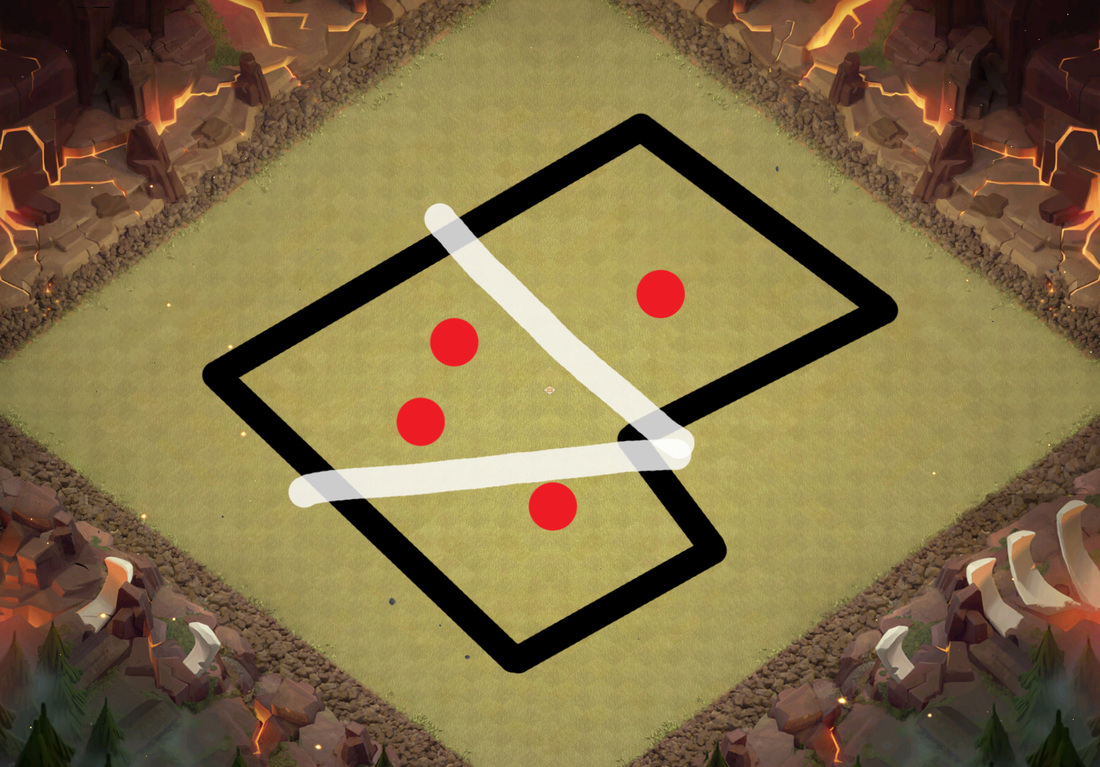
Looking at Groups, Sections and TerritoriesWhen it comes to groups, there are 2-5 defenses per cluster, and what is important is that there needs to be traps between the group. There needs to be traps within a group separating them equally. These are your bands together, and having for example three cannons with no air defense cover is no good, but having a cannon/wizard/archT with no traps between them is no good either. Also just because there are traps between them, doesn't equal it's well placed (example 1 below).
|

From TH9 Onwards
From Town Hall 9 and on wards there is more things you have to remember:
Queen's Territory. Queen kill is part of Town Hall 9. Accept it, and recognize there is and minimize the amount of defense structure the enemy will be able to take once they aim for the Queen Kill
Kill Areas: The amount of 'territories' for which are considered dps are located. Some base might have 3, some bases might have 2.
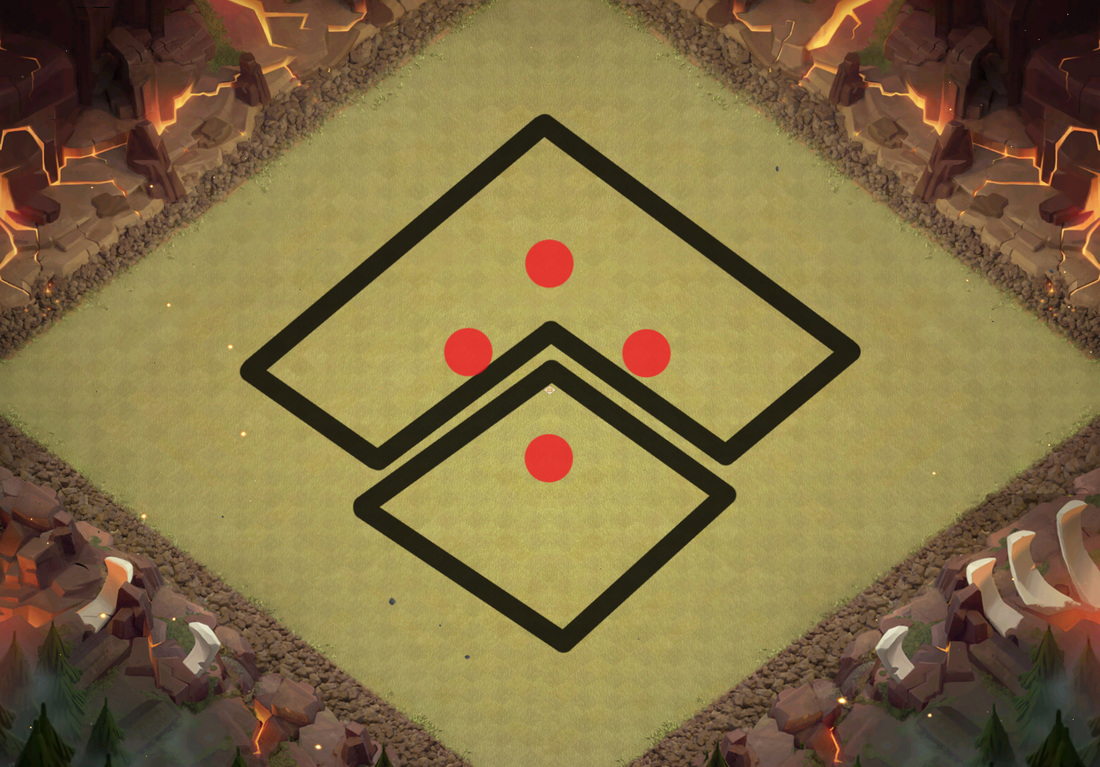
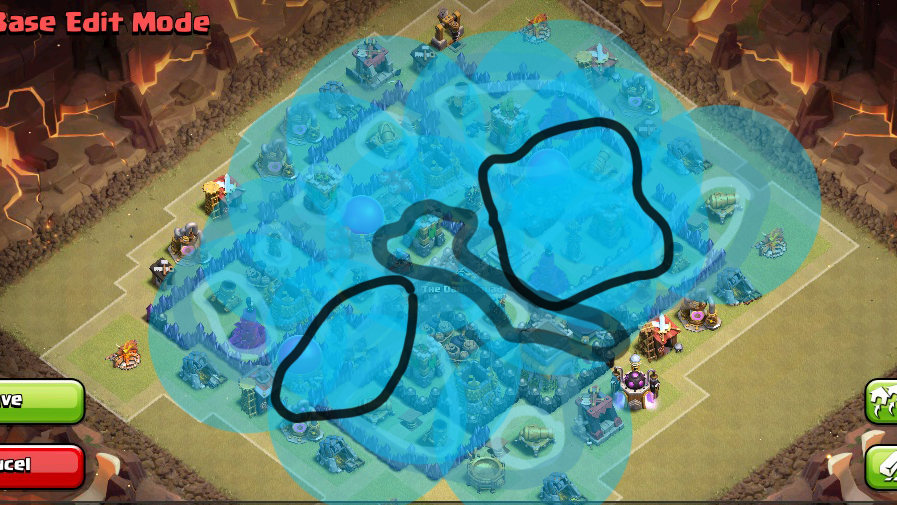
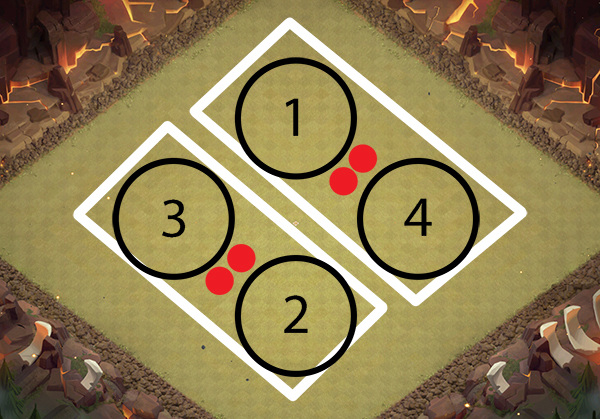
Illustration of Territory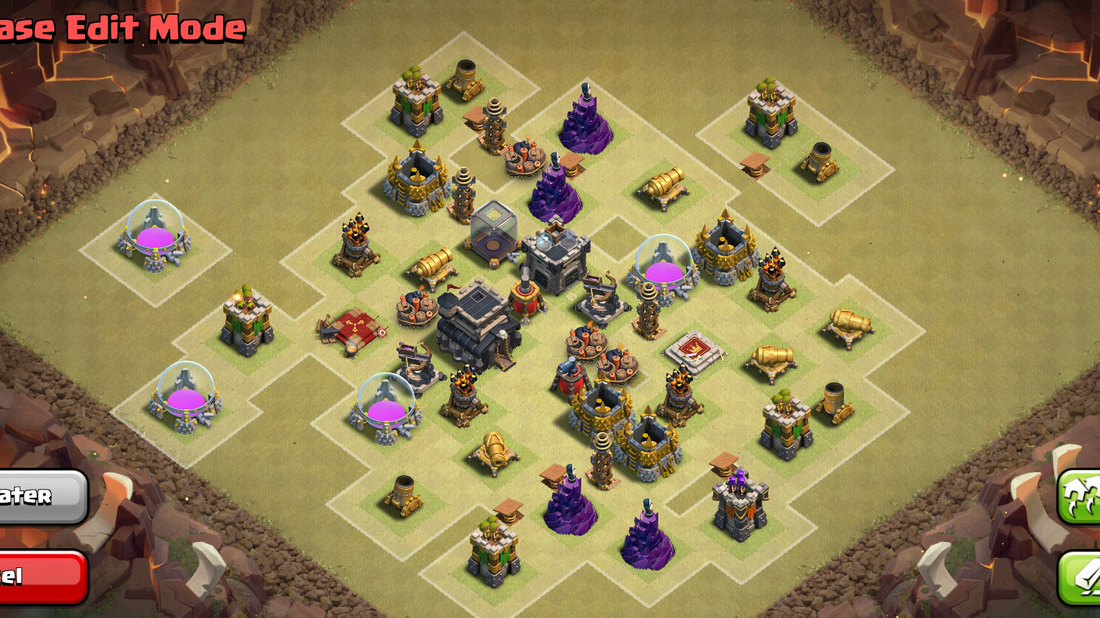
|
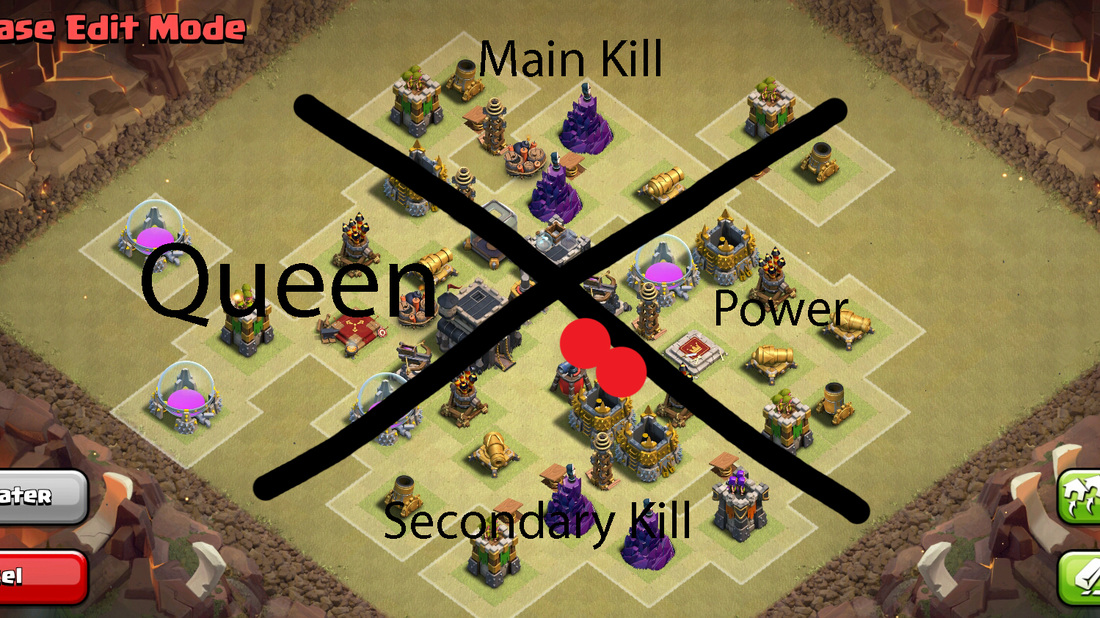
This is NOT a base, but it illustrates a (sorta) good territory, section, and groups for which an actual base can develop on. Even without walls, you can see the relationship of which defense can interact. (I missed up the dgb with the AD being there, forgive me :P).
There is a dedicated Queen area, a "Main Kill" area where most of the fire power is located (double tesla/wizardT), and a secondary kill area. The power was just another concept I was thinking about having two ADs located there in order to bait, but not part of this guide. So remembering to balance out the territories, putting spring traps between groups, double giant bomb between sections, and knowing the types of Territories is important. |
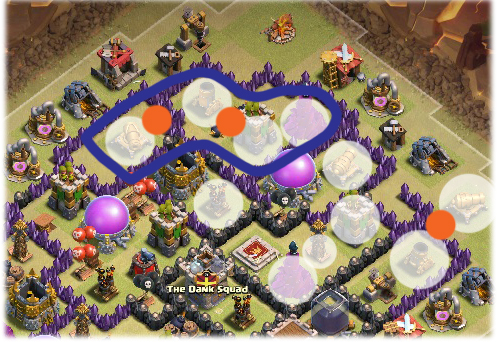
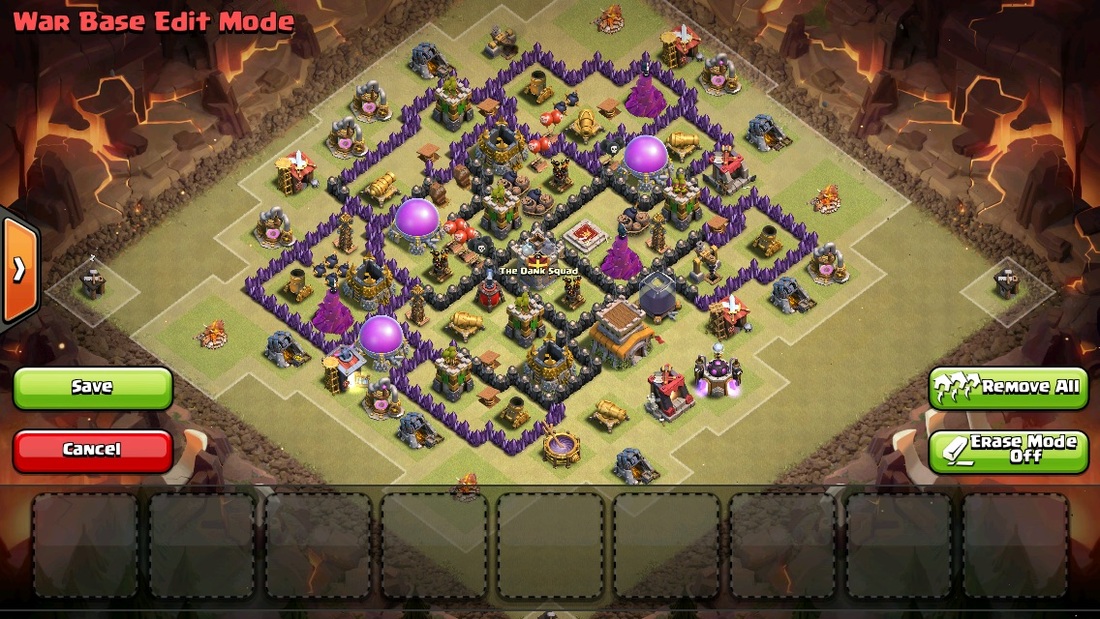
Football Player's Base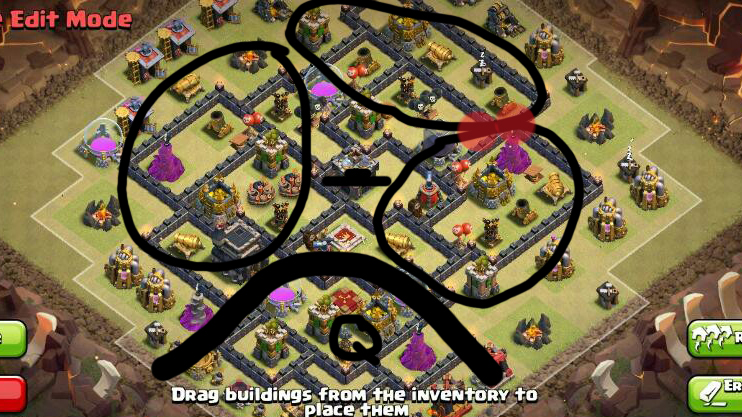
|
Although this Football Player's base might not look so good, let's just ignore that and purely just see it based on Territory.
In this example, you can see the fact there are 4 'territories' to this base. The Queen has her own territory, and the three other Kill Zones. But as you can see, the double giant bomb is place within one of the kill zones, while the two right side territories barely have any traps. The Double Red circle would be the area where DGB is needed since the fact that 2/3 his remaining defenses are located at the Right half of his base. I'll dissect and expand this base later on, in another page. |
Thanks for reading, and hopefully you develop this insight for base analyzing. There are more complex interaction between Groups, Sections, and Territory and these can be follow the newly developed concepts for example the Queen Island, and Spring traps between inner and outer defense.
