
TH9 War Models - Previous Model and Current Model
Published December 28, 2015
Welcome to the page where it describes models of how to build your TH9 War Bases. When it comes to Building a TH9 war base, you'll be surprise at the fact that the first few buildings you've placed down already can prove how well your base will do and how well your base won't do. When it comes to building a base, for beginners or for those that want to advance, there have been multiple occasion which people complain with the fact that their base no matter how much they try to change their design, it always ends up looking somewhat symmetrical, or circular shape, rather than being asymmetrical. If you look at my [War Base Reality Check] Page, you can see the fact that rule #5, almost ALL of these bases have similar structure, why is that? The reason is because of the fact that, the "Models" of starting the base already dedicate what the end results will be. This page is a short explanation explaining the two different models of war, and what the previous model was and how you should avoid this, and what the new model is, what you should adapt. This page just explains the models, while another page will explain how to start a new model.
Previous TH9 War Model
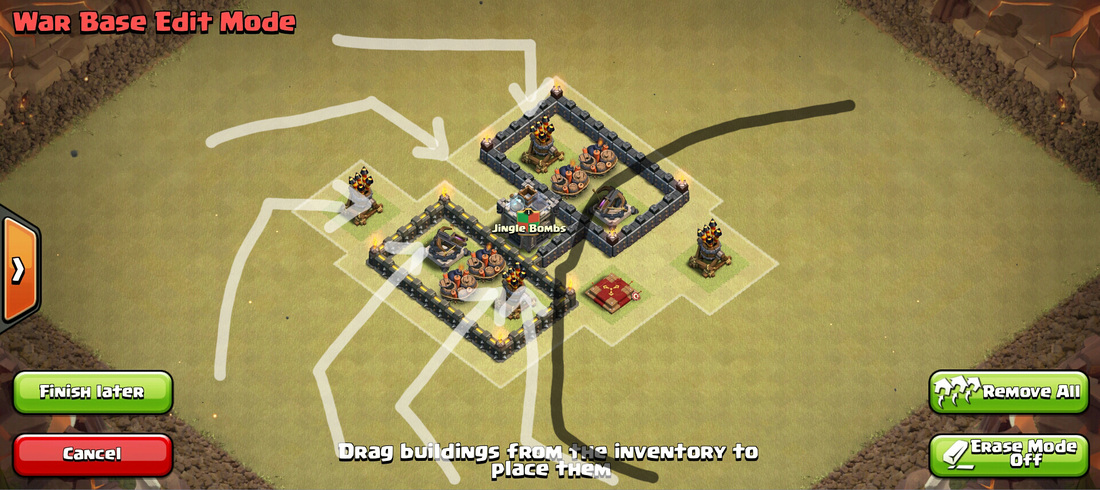
Diamond Shape Model - Centralized CC, [Xbow >> DGB >> AD]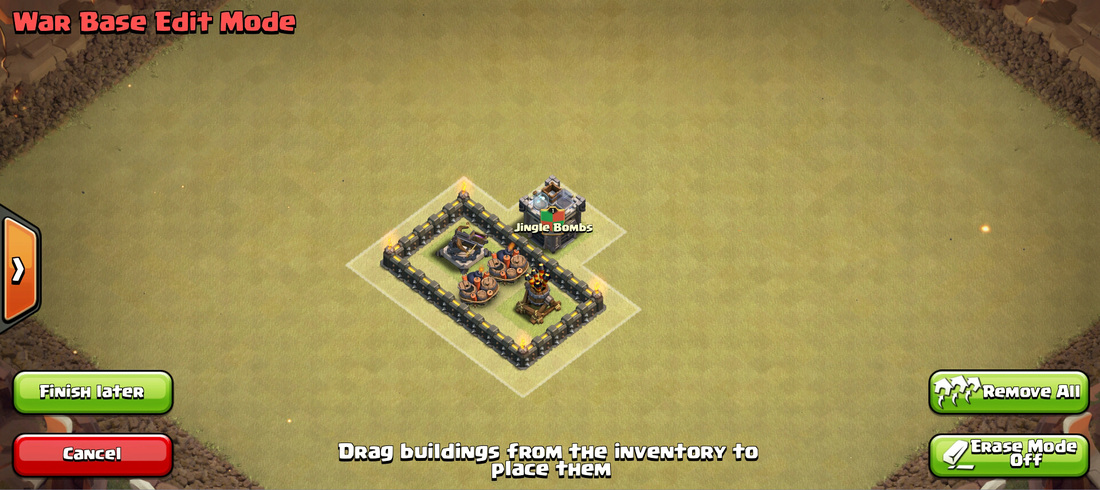
When it comes to building a base, the most ingrained model of 'how to start' building. they first start with a centralized Clan Castle, because since the beginning of base building, centralized Clan Castles have been such an important role to how bases are built. But as this date, with the invention of poison spells and other modes of buffing and new attack strategies, clan castle troops no longer have as big of an impact compared to before. Looking at this image, you can see the fact that after centralizing the clan castle, the building then focuses on building something around the clan castle, which usually ends up with Xbow>>DGB>>AD.
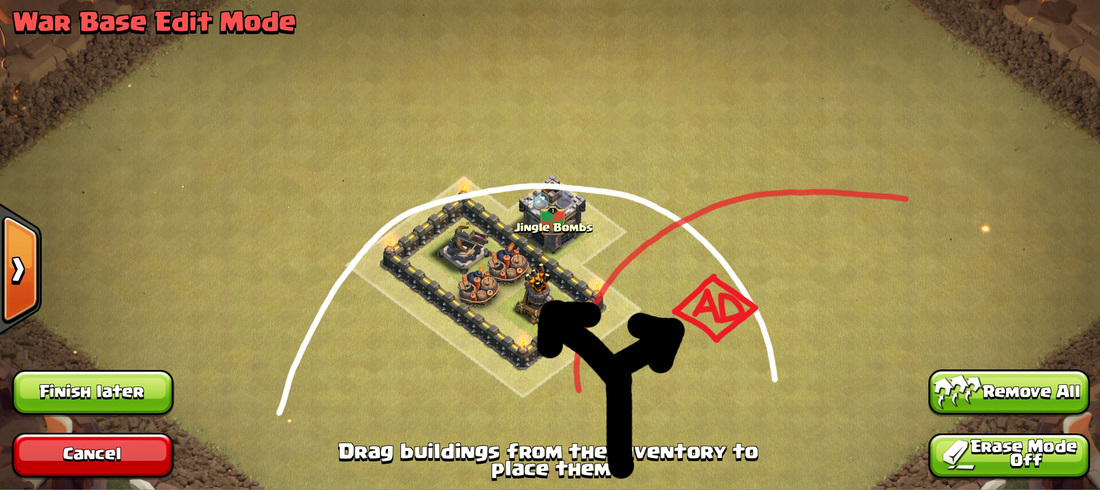
With this set up, it's already destined to fail due to the fact that it's 'coverage' area of the AD at the bottom already takes up alot of space. If you put an AD anywhere that's too close to the first initial AD, that AD gets taken out together (along side Queen). So after placing this first AD, the second AD would most likely be placed on the opposite end of the Clan Castle.
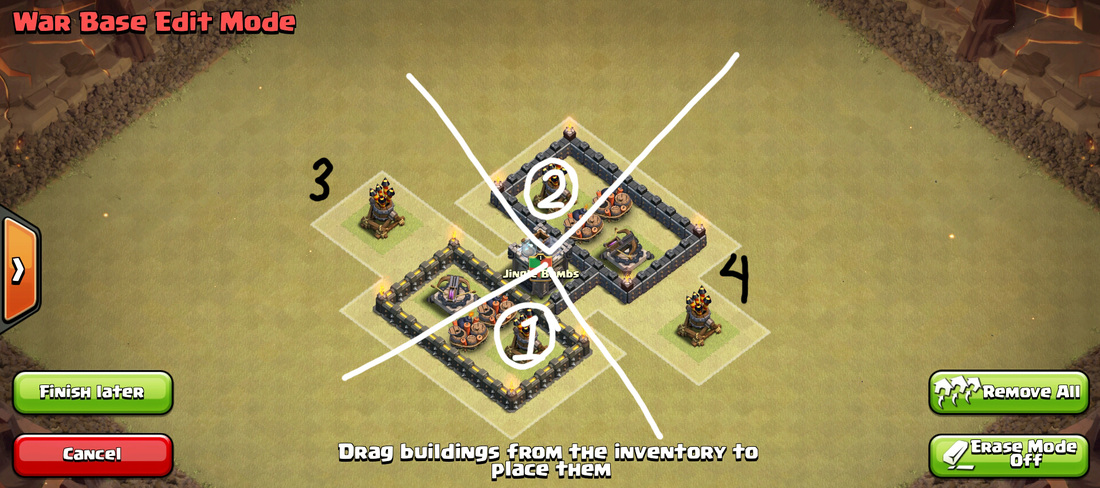
With this set up in mind, there might be alittle wiggle room, but the fact remains, that the first two AD will be close together, and the last two AD will be pushed alittle further out so that it doesn't form a tight circle. Usually after putting these 4 ADs down, the Queen is considered afterwards, being put relatively close to either #3 or #4 AD so that it isn't close to the DGB.
From this model, you can see that almost ALL bases of this design has a diamond shaped AD. positioning, without
|
A reason why this model is no longer works
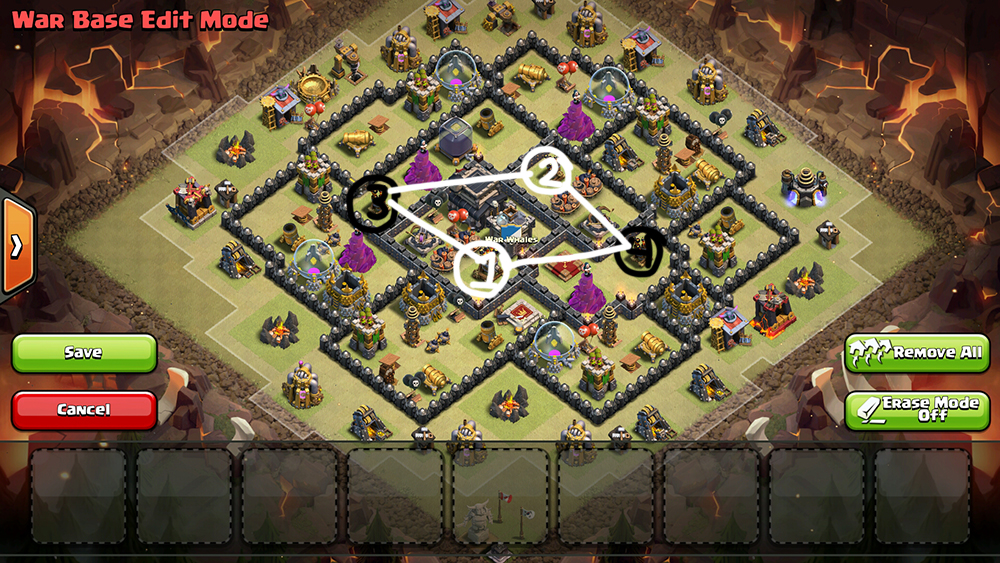
Against Queen Kill - Investment is worth it for the OffenseI'm sure the fact that you guys know that one part of an attack plan is the Queen Kill. It's the most basic step towards heading to the intermediate level of 3 starring attack strategy. With a base such as these, the enemy has alot of access towards getting a large amount of your base with just their Heroes Golems and a small amount of wizards. They can come from the South, they can come from the north, they can come from the East, which is the reason why Offset Queen is invested to reduce the amount of destruction which Kill Squads can do as they kill your Queen. If they went to kill your Queen, but also took out 2ADs, 3 Cannons, 2 Archer Towers, One Xbow, 2 Wizard Towers, that's literally half your base right there, including minimum 2 spring traps. With only half your base left, against 2 spells and 20 hogs for example, that's not enough to stop the enemy.
Against DGB - Surgical can come in from ALL anglesWith the invention of Surgical Hogs, the amount of buildings that can be taken on the first attack is extremely easy. By the time Hogs reach the Double Giant bombs, they have already served their purposed and killed almost every single threatening defenses. Double Giant bombs pathing used to be good due to the fact that Hog Packs came in two groups of 12 or 14, but now the group has split into 3s 6s, 8s which is more than enough to kill the initial cannon and AD without protection and trigger Double Giant Bomb. When it comes to this Diamond Model it's no longer effective since the fact that it's no longer has any strong deterrence.
|
The Current TH9 War Model
[30% Queen / 70% AD] Ratio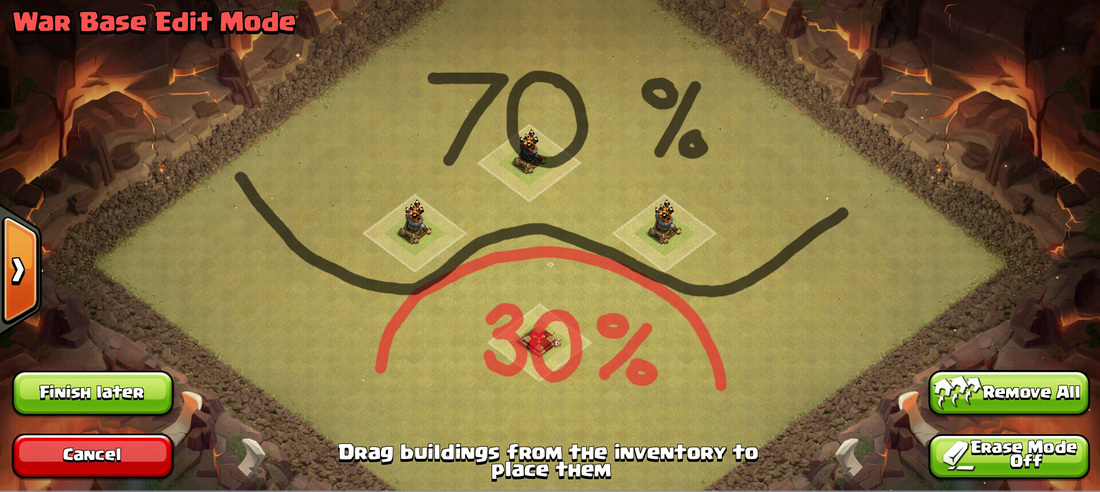
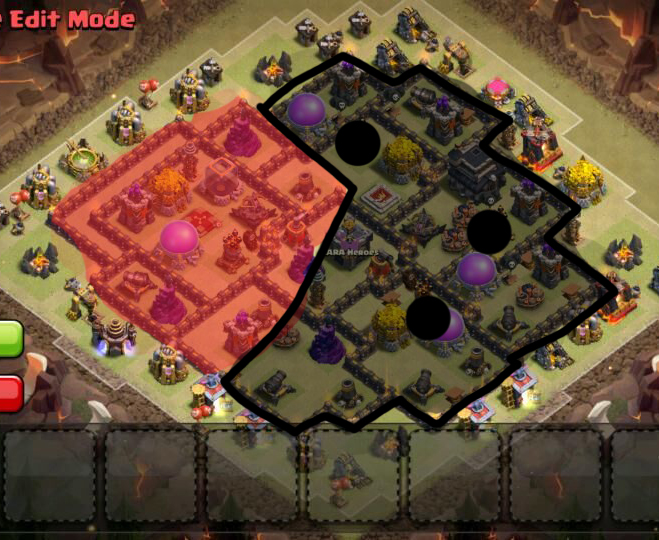
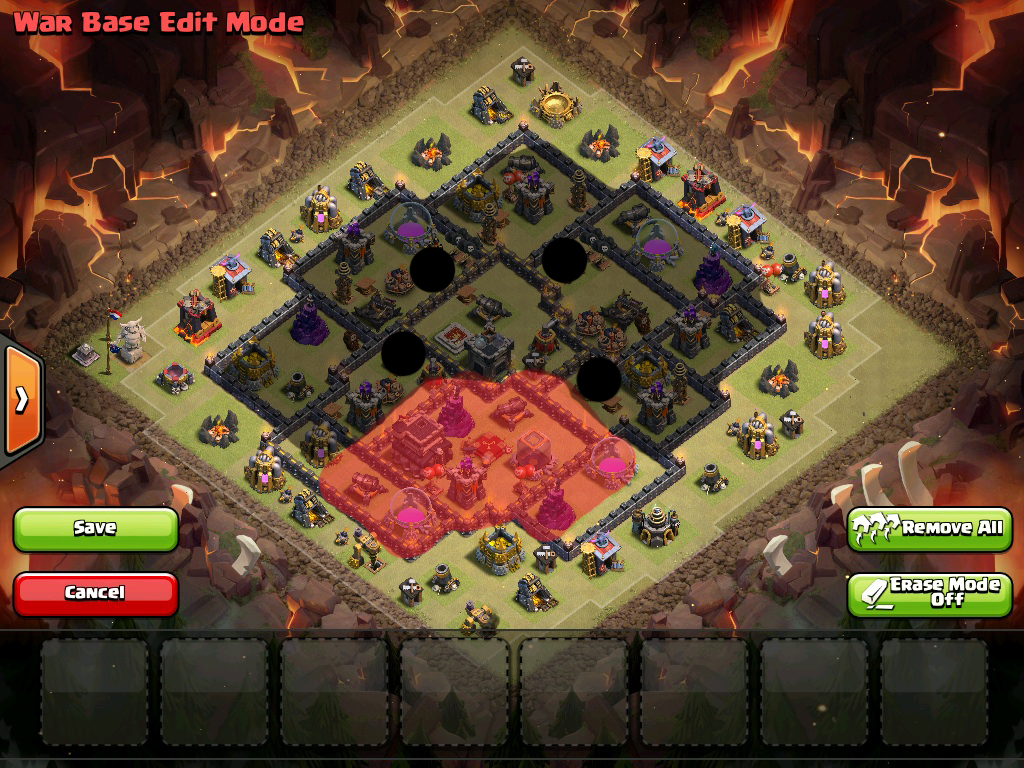
When it comes to the Current 'TH9 Model' of base designing, you can see the fact that it follows the 30% Queen, 70% AD ratio. Look at any current strong bases which are being employed by the top tier elites and you would notice the fact that most bases follow the 30-70 ratio. Why is this ratio so good? Read alittle more in my [Offset Queen] Guide, but the point is the investment cost of having Queen with only 30% of the defenses allow the enemy a hard decision when it comes to Queen Killing. If they Aim for the Queen Kill, their hog squad will generally have to deal with that remaining 70% of the base which is difficult, as the King/Golem are trapped in the Queen Area. It's all about the investment and the exchange between the defenses and offense. If they went Golem Heroes into the 70%, they would have to invest alot of ground troops and probably be unable to get the Queen, which is a strong unknown variable which attackers aren't willing to take.
The 30-70 model is something that currently works the best due to the fact that it's the model which the exchange are better for defense. If for example you follow the previous 'Diamond' model, you'll notice the fact that the enemy can take out about 40%-50% of your base with just ground troops alone, which is not a good investment.
|
Conclusion
In conclusion this page isn't really teaching anything with regards to HOW you should convert to the next model, but it refers to the fact that the 30-70 ratio is almost the universally accepted model of creating a base design. Being able to distinguish which model of the base is important because of the fact that the 30-70 ratio is one of the first steps for which is the higher level of base designing. The key words of which the reason why the models work is because of the key words of 'investment' and 'exchange' which Base Designers and Attack Strategies have to put into consideration. Sectioning is one of THE most important concepts of base designing which people need to understand at the level of Air, Ground, and Wall Pathing.
Look at any of the bases that currently exist (in TH9) and you can see the fact that almost all bases can be separated into these Two Models. Those that follow the Diamond Model does not do well in protecting the Queen and the exchange rate of giving them the Queen and Half the Base to the ground troop is not acceptable in this stage of base attacking due to how many angles of which enemies can come in from. Only the 30-70 Ratio Model which puts Queen away from the Kill Zones makes it harder for the enemy's Kill Squad to penetrate into other zones and get their value's worth when it comes to what it can take down along side the Queen.
Look at any of the bases that currently exist (in TH9) and you can see the fact that almost all bases can be separated into these Two Models. Those that follow the Diamond Model does not do well in protecting the Queen and the exchange rate of giving them the Queen and Half the Base to the ground troop is not acceptable in this stage of base attacking due to how many angles of which enemies can come in from. Only the 30-70 Ratio Model which puts Queen away from the Kill Zones makes it harder for the enemy's Kill Squad to penetrate into other zones and get their value's worth when it comes to what it can take down along side the Queen.
