
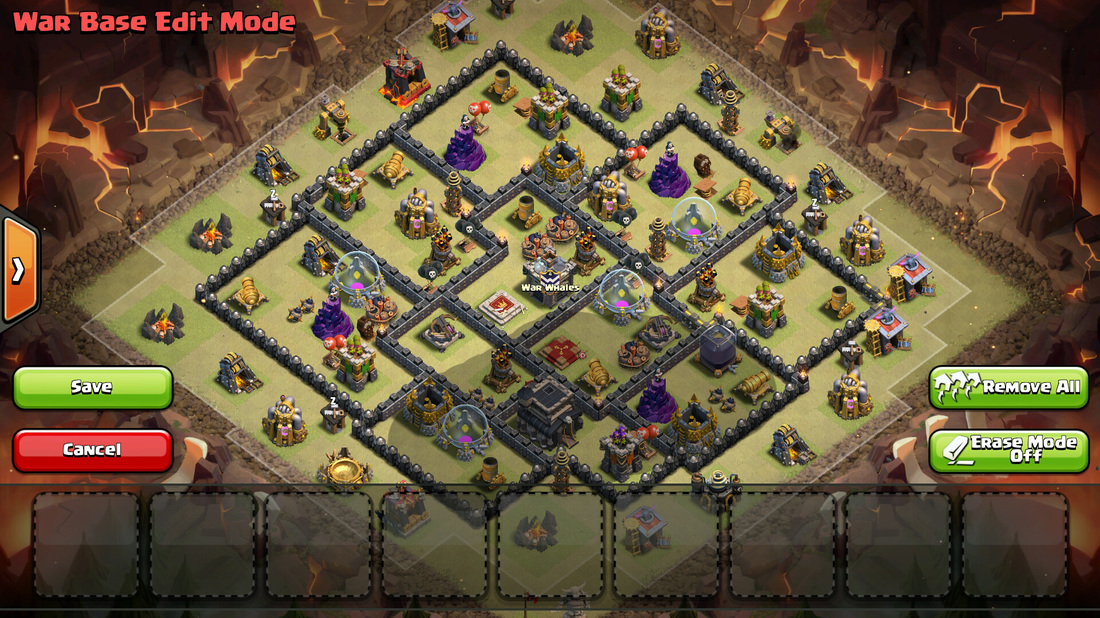
Second Gen: Metaki #6 - Ovaki
Version 1.01

Version 1.01
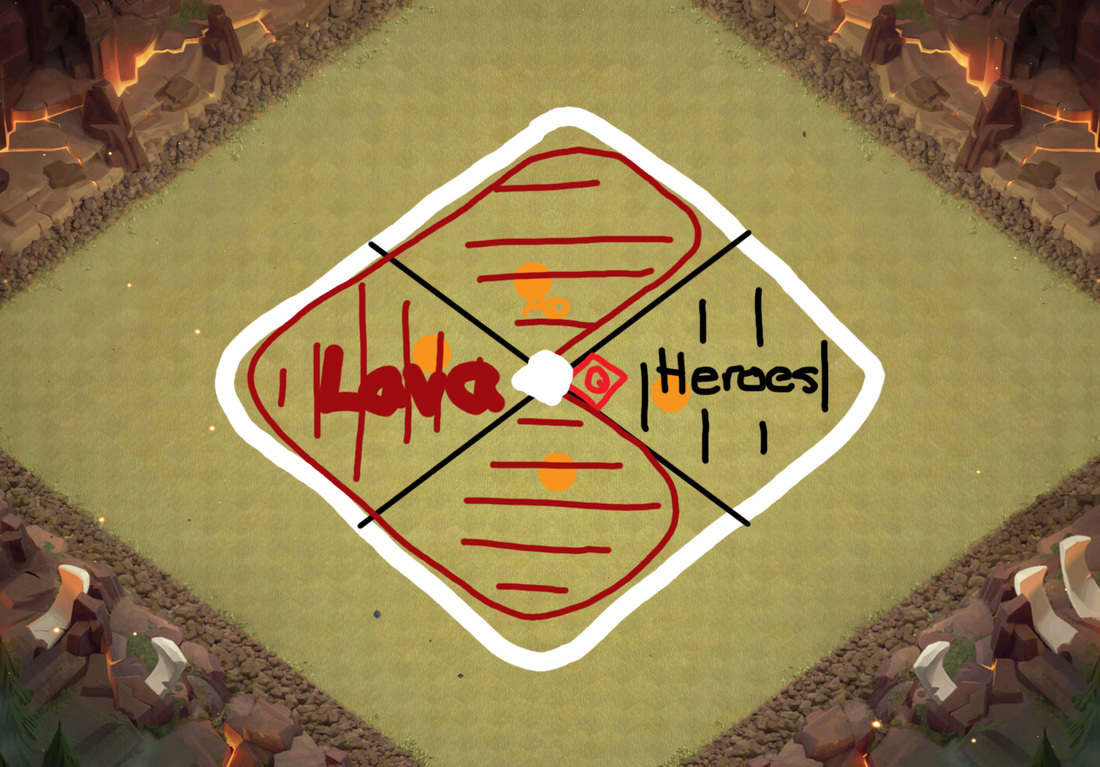
Why is it called Ovaki?
|

Tweaks
|
(v1.00 shown)
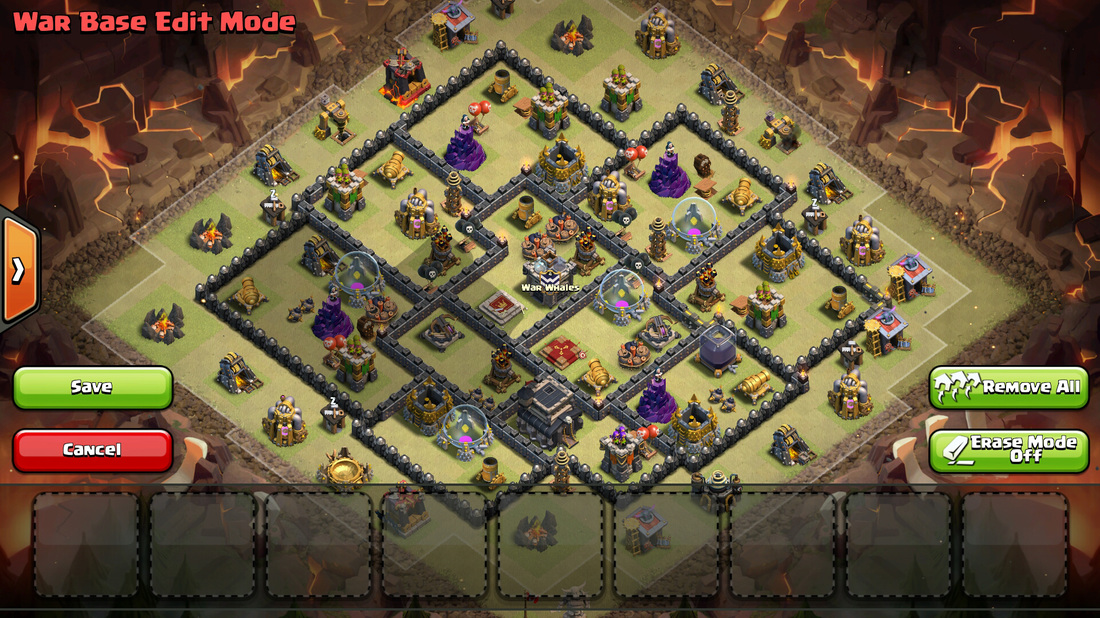
Version 1.01
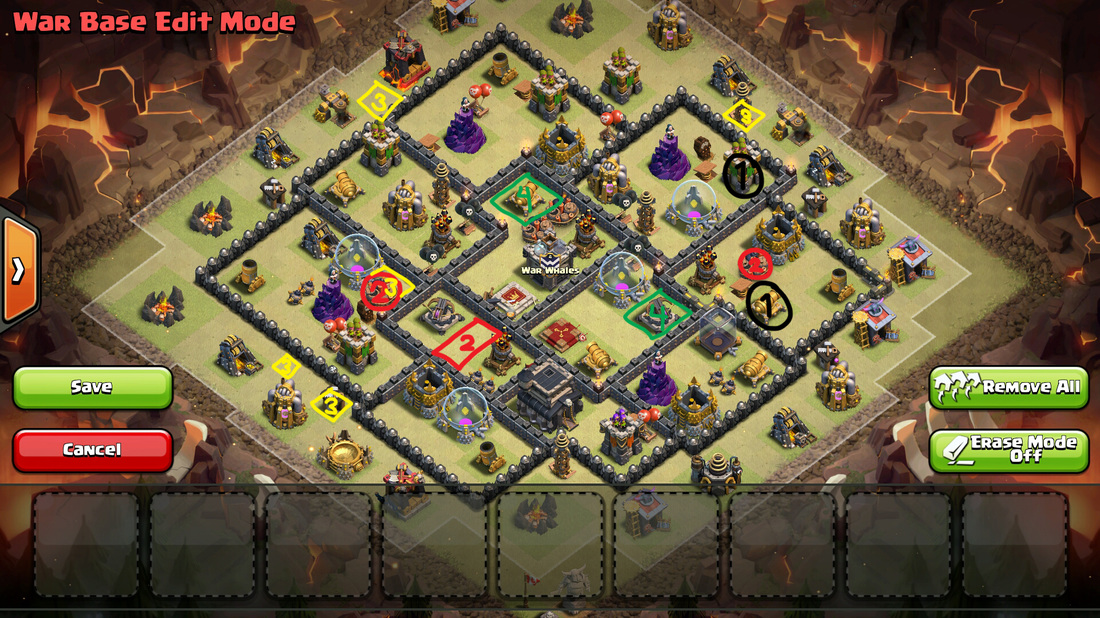
Please note, Version 1.00 tweaks still apply - mortar on the left exchanged with the cannon marked with green #4 - giant bomb can be placed between that cannon/xbow instead of the marked red #2. Version 1.00 Air Skeleton/air mines have not being tested yet so their locations aren't set. 1) Marked in Black, The Archer Tower and the Cannon can be switched. having ArcherT there protects the Mortar on the right more, also can target loons. 2) Marked in Red: Testing out the single giant bomb theory. The General location is between that Xbow and AD (still could be triggered during queen kill though). More on that later. 3)Yellow: Teslas on the north can be moved to any of these locations. (if you move that giant bomb on the left though. 4) Green: You can replace that xbow with another cannon, giving even more dps against golems on the right side. Problem is though xbow at that location can protect 3 ADs, while Xbow on the top location can only protect 2 ADs. |
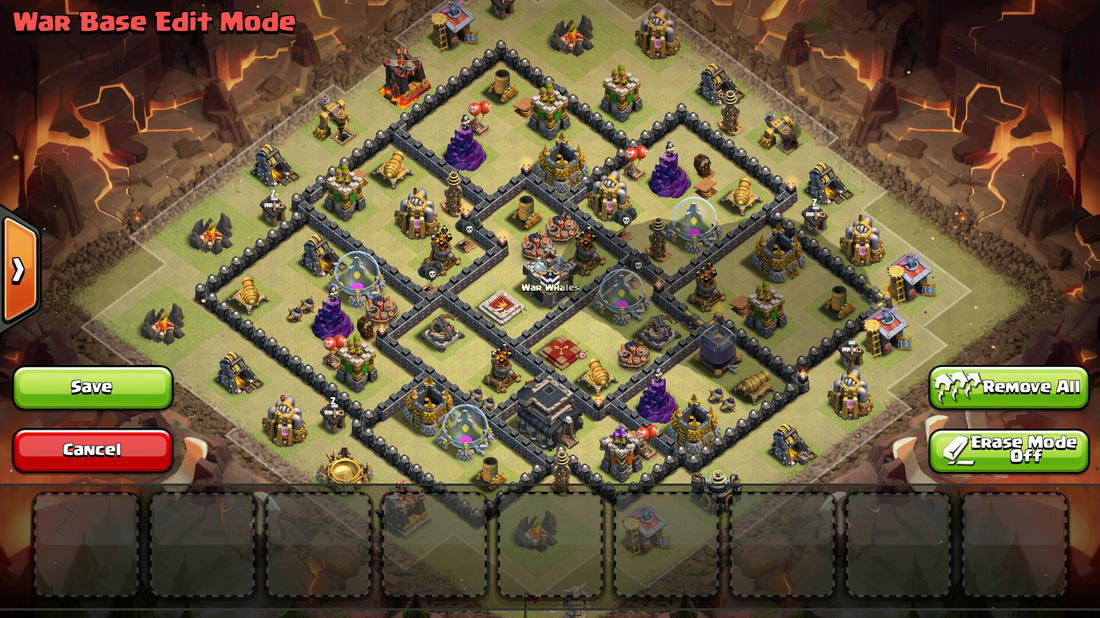
CC Radius

Need to have at least 6-8 fillers/30CC space as the enemy can still kill one defense and lure from the side of the wizard tower.. The mortars on the outside don't really matter as they are serve as protection towards the wizard Tower and meant to grab attention.
Why No Two Double Giant Bomb? (Testing Phase)
Taken from Mungos' Monday tip.
|
Source: http://www.reddit.com/r/ClashOfClans/comments/32io1b/base_mungos_monday_tips_how_to_spot_a_base_that/
Let's assume, however, that your attacker is skilled, and pops 1 giant bomb with the hybrid, en route to the AQ – now it's 3 heals for 3 bombs. However, this is still much tougher for the attacker when compared to double giant bombs; with the latter, the (skilled) attacker is guaranteed to pop 1 set with the hybrid, which means your base has 1 double giant bomb spot left, and the attacker has 3 heals. Now obviously, the attacker is not going to run through said spot, setting both bombs off simultaneously, as that would end the raid; instead, the attacker will achieve pathing to set the double bomb spots off 1x1, which in effect, means your double bomb set is functioning identically to 2 single bombs, with the extremely negative consequence that both its constituent single bombs are covered by the same heal. If, instead, you opt for 3 single bombs, you at least completely control where the attacker must heal, and can place said bombs away from teslas (teslas kill hogs. Forcing heals away from them helps them do this). |
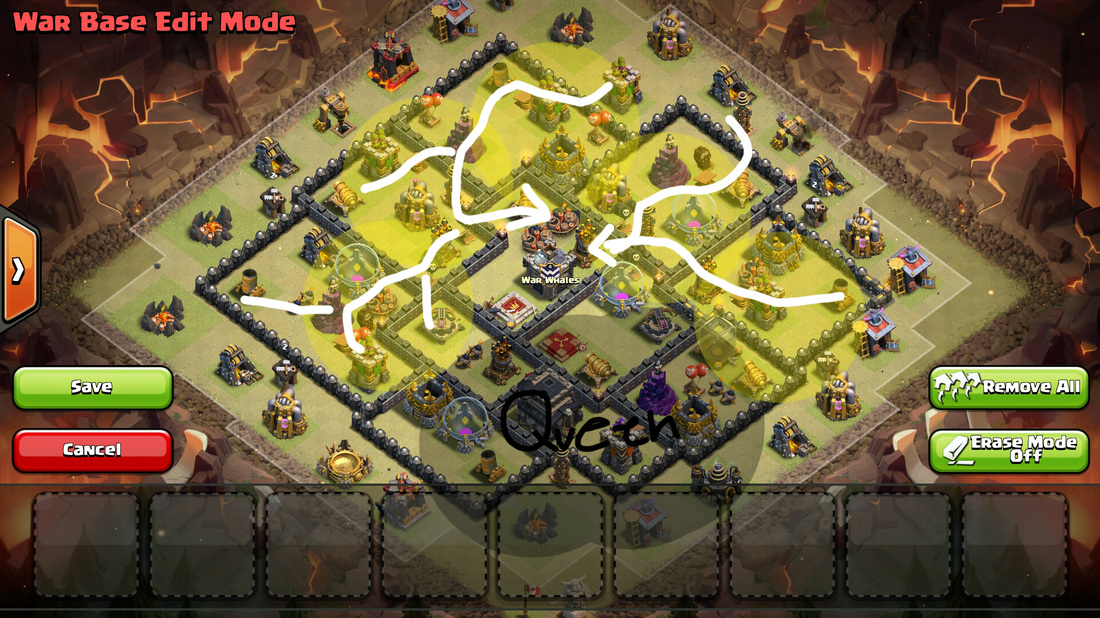
What this basically means is that, it's a theory of 'spell placement pressure' (a theory which I feel like I can touch upon in the future), where after the Kill Squad kills the Queen. Usually it will need 1 spell in order for it to actually achieve this feat. With 3 Spell remaining, if you put a single giant bomb at an inconvient location, it can force the opponent to pre-heal 1-2 seconds earlier each time. If you look at my image, you can see that if they for example Queen Kill from the south, the north side still has 5 sections which needs about 5 heals to cover. The Double giant bomb is located directly at the center area where both sides meet and the single giant bombs are made to force the enemy to trigger earlier. Also check below in the "Weight Ratio" to see why this DGB is effective.
Against Lavaloon
More Steps And Travel time for Loons/Separating the Hounds
It's a follow up to my Series #5 [Spell Placement Dilemma - Separating Loons from the Hounds] topic.
Spread Out Junk BuildingThere are about 2 main reasons why junk buildings are placed so close to the defense:
1) To Prevent Anchor troops 2) To Prevent Easy funneling But what happens if your meta base is unluable to begin with? Also the fact that enemys most likely now bring a lightning as they queen kill. Even if they do manage to lure, it'll only take about an extra 5 troops to drag everything across the map. With this logic, I find it alittle silly that people are not pushing the boundaries of junk buildings as far as they can, since pushing out those junks can ultimately give an extra 3 tiles worth of travel for which loons have to travel. Some spots such this Metaki Series #6, the north side, what are the chances of them trying to Queen Kill from the north? What's the point in funneling through there? If you know that your CC is super hard to lure, and your enemies isn't going to funnel any ground troops on one side, why not benefit from the extra boundaries created by the junk buildings? If you know that there is a side which they are going to Queen Kill from, use my [Builder's Hut Junk Distraction] Technique (see Metaki Series #5). |
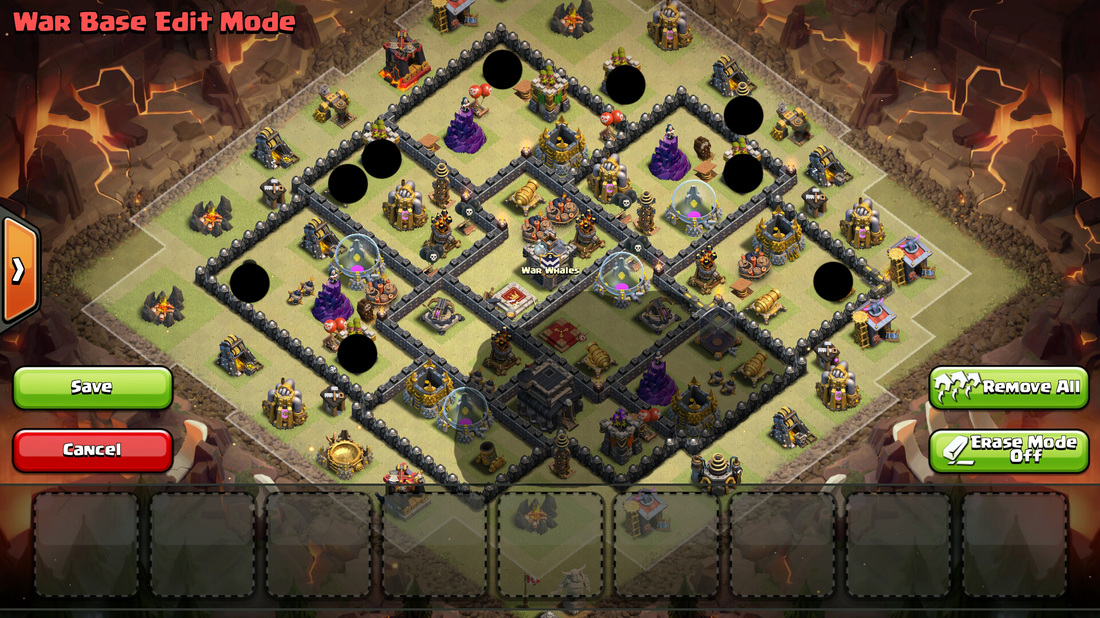
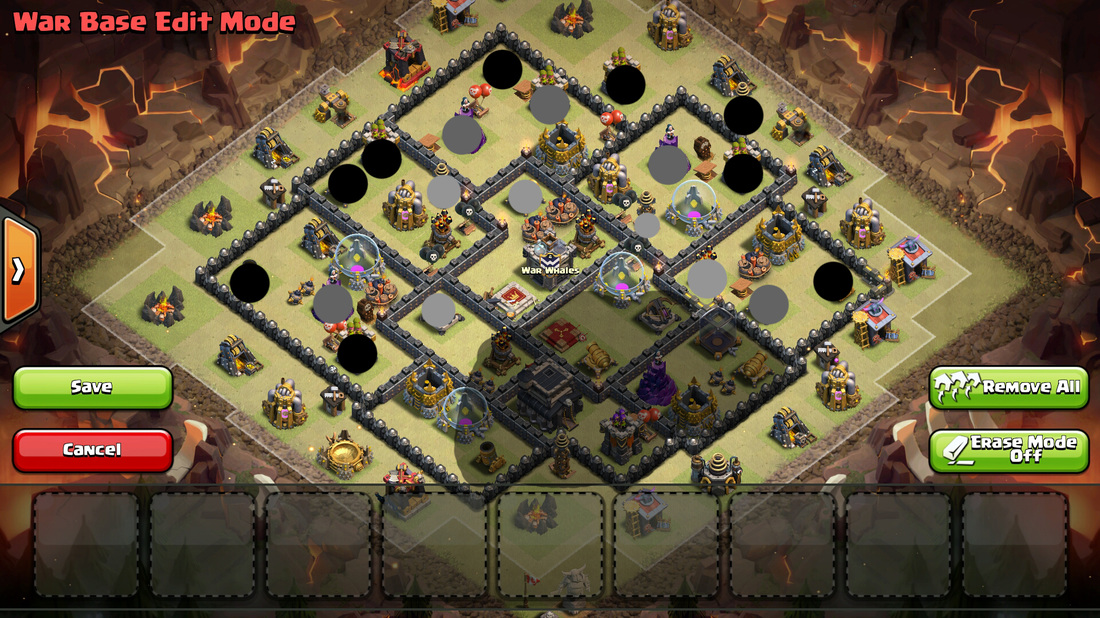
Lavalooning Scenario (After the Queen Kill)The First Defense Reachable by Loons (black)
The SEcond Defense Afterwards (Grey)
The Third Defense Afterwards (Light Grey)
The Fourth Final defense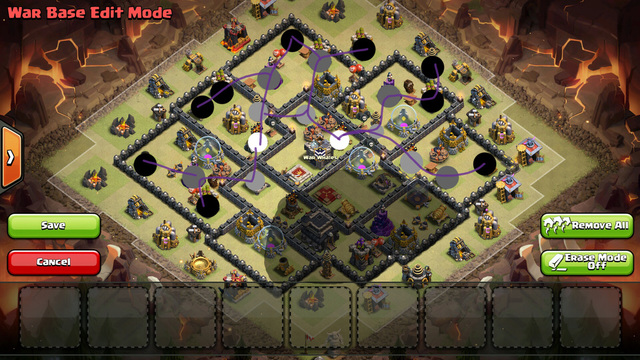
I've drawn out in purple how the pathing would work for loons. If you look at this image, you can see the fact that both the left side AD and the central AD has to take 4 steps in order to reach it. This is the goal of the Y shaped Wizard Tower concept, is to separate the loons from the hounds as long as possible as well as give more pressure towards them deciding where to put the rage spells.
Rage Zones (2 Spells)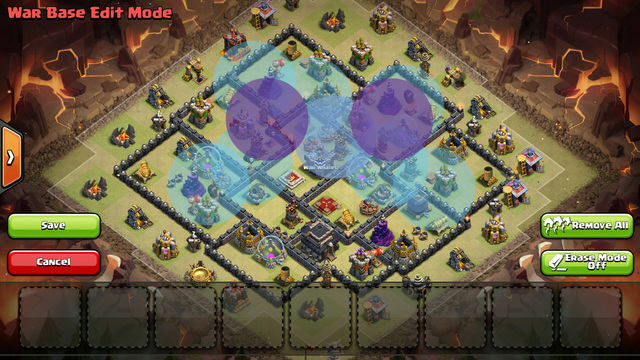
If the enemy has two spells to spare, the only places which they can put the best rages are marked in purple. This will lead the loons to directly from Wizard T to tesla and still have that 1 second rage mode while heading towards the AD. The other rage locations (marked in blue) offers quicker loon kiling the first few defenses, but then there is no rage left as the loons travel to the AD.
Rage Zone (3 Spells)
If the enemy has 3 spells left, that means they can easily rage that right side and still have enough spells to take care of the top section. Nothing much to say but the fact that they'll have to consider the remaining sides of the base.
|

Queen Kill
|
Where the queen is located is mostly directly towards the south, sections.
Bottom Left/Bottom Right
Left Side
Right Side
|
Weight Ratio
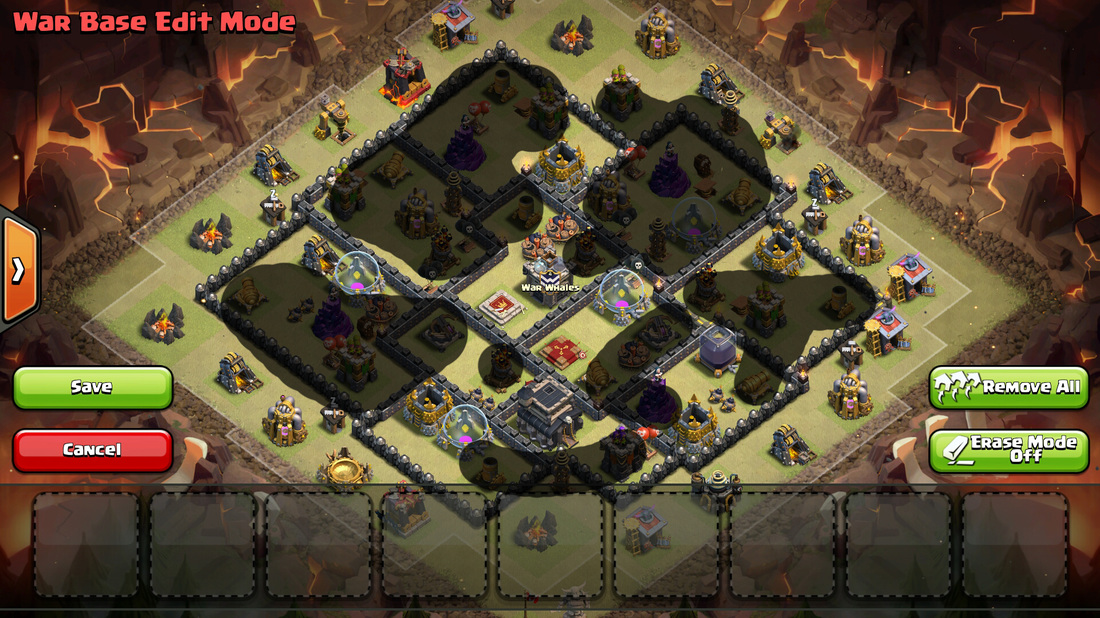
I've talked alot about the 'weight' of the base before when I was explaining my double giant bomb placements which if you look at this image more you can see that the top side of the base has the most "heavy" when it comes to the amount of section it has to cover and the defenses within it's group. the other bottom sections are secondary and are scattered about so they really don't possess the amount integrity compared to the top sections. Which is why the weakness of this base is explained below.
|
Weaknesses to Ovaki
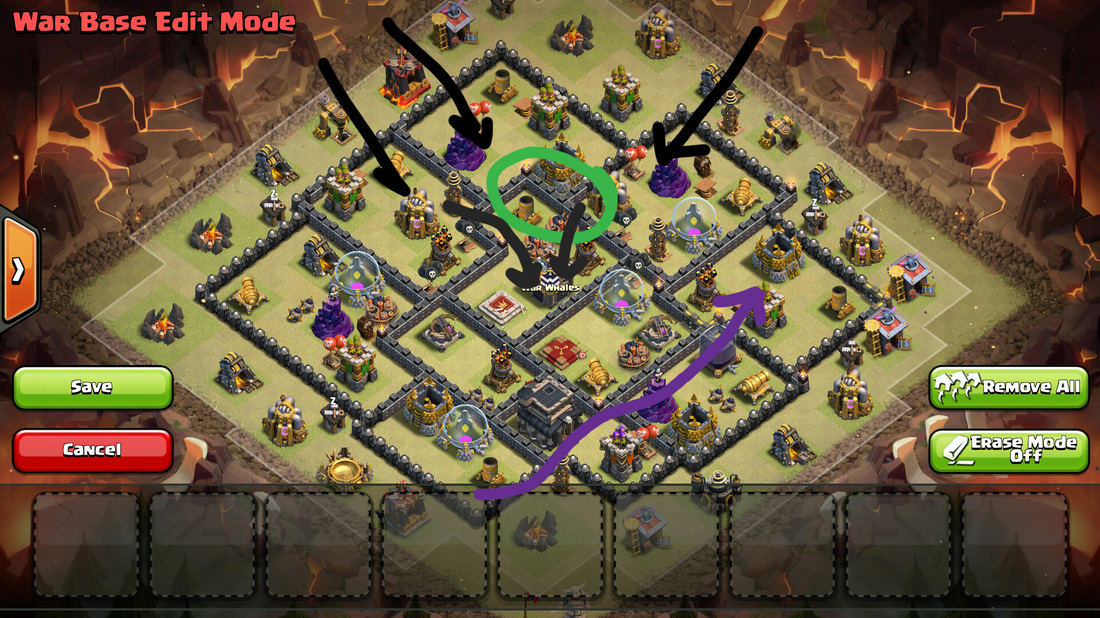
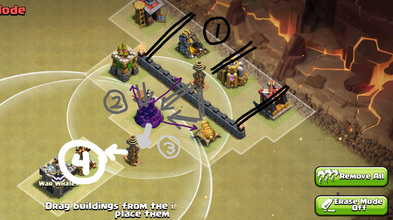
There are really too less compartments (click here to see why), and if they start from the north side, they can almost still have a full health hero as the golems enter the core. Afterwards they can back end hogs (marked in purple) and finish off the remaining of the base. As I have said before, the top left AD and the center AD possess the most threat, the remaining two ADs are more 'support' types of ADs so they don't influence as much and are more vulnerable.
|
Here are some valuable feed back from other knowledgeable TH9 experts. I do agree with all of their facts, and thanks for the help.
|
Quote from Godll:
" I think the giant compartments really make you weaker to shattered laloon because they can come from a lot more places to eventually walk to your queen. In your base I would come from the top right and work my way to the core because there aren't too many point defense in that area." Quote from TheJ:
It looks good so far. However, it needs more compartments. I always make sure that my bases have 14 compartments, this one has 11. Avern, a maxed TH9, almost got 3 starred by GoWiwi due to not enough compartments (again, 11 in total). A TriGoHo or maybe shattered will work on it as well. Send in from north, deactivate DGB and then in core kill queen. Do backend hogs to clean up remaining defenses. Of course this is a rare attack, and would require very high heroes, but it is do-able. The base covers GoLa very well, the HP Should stall heroes while the CC kills them.. |
Conclusion
In conclusion, I had fun exploring the oval shaped design of the base. Would I say Ovaki is a better base compared to what others are doing? Hell no. I'm exploring a different route to when it comes to making an anti-lavaloon base compared to others, and testing out the Y-shaped wizard Tower concept. Compared to #5 Arrowtip, Ovaki expands the Y shaped design even better, but in return lacks the integrity of the "ratio" of most anti-3 star base possess. Trying to make that Y shape placement uses up alot of walls and makes the compartments bigger.
